 The washing machine is a complex mechanism with its advantages, disadvantages and unfortunately breakdowns, as well as all appliances.
Imagine that a situation has arisen, when during operation the machine rumbles, growls, incomprehensible sounds are made.
If you twist the drum with your hands, these sounds are heard again. Scary.
Most likely, the helper is broken.
Analyze Problem
You will have to figure out how to remove the drum on the washing machine. With your bare hands it will not work, but with a set of tools in stock, it is not difficult. So, what will come in handy?
You will need tools:
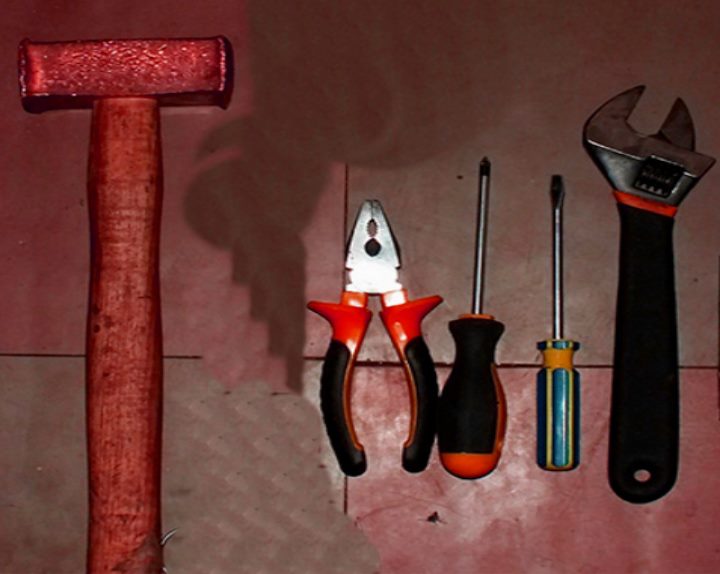 Screwdrivers, pliers, hammer.
- A wrench.
- Metal hacksaw (if necessary).
- Replacement parts.
General safety requirements for the disassembly of the washing machine, regardless of the type of repair and loading - empty drum, de-energize and disconnect the water supply, that is, disconnect the hose.
Removing the drum
Actions for a front-loading machine
Depending on the model of the washing machine and the manufacturer, the disassembly process may differ slightly.
For example, you have a washing machine Indesit or any other, and you do not know how to remove the drum.
Let's figure it out. To solve the problem yourself, you will have to:
- - unscrew all the screws on the back wall, remove it together with the control panel and the detergent compartment;
- - It is not necessary to disassemble the control panel, it is enough to put it aside;
- –
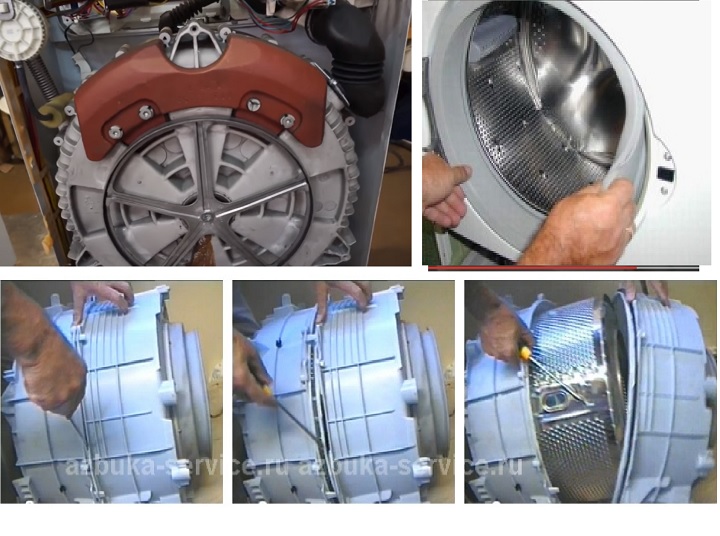 take out the collar: unscrew all the screws, remove the panel at the bottom, find the clamp spring and pull it;
 - - remove the front panel, now the tank is open and accessible;
- - remove all wires and in general remove everything that can be removed (spigots, wiring);
- - remove the head screw (it holds the back of the tank);
- - pull out the tank, if possible, hollow out the tank and take out the drum. Replace it with a new one;
- - Reassemble in reverse order.
Actions for a vertically loaded machine
What actions are needed to get it out?
 From the bottom of the machine on both the front and rear walls, unscrew all the self-tapping screws.
- Unscrew and remove the side panel.
- All wires are removed and unscrewed screws are removed.
- Similar to the first, the second side panel is removed.
- The shaft is fixed with a screw, which is also unscrewed.
- It remains to remove the drum of the washing machine ardo, or bosch, or candy, etc.
Eliminate the problems
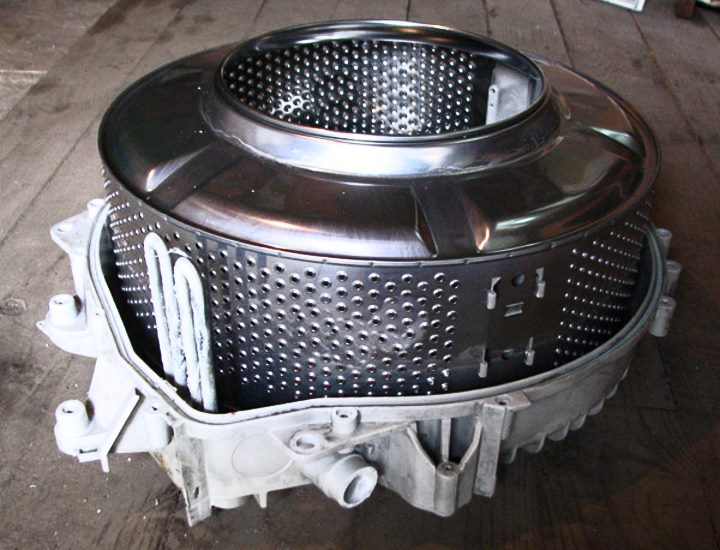
Disassembling the drum
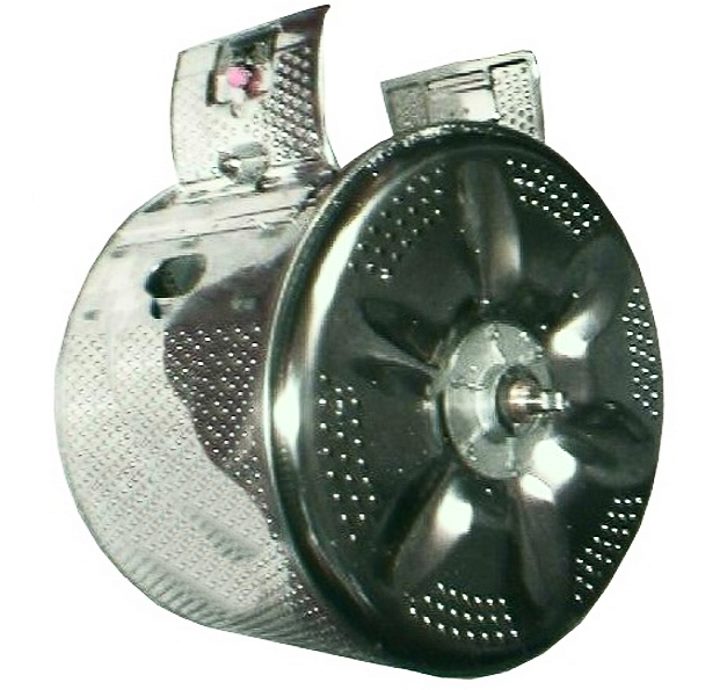
The tank in a washing machine consists of 2 halves. One tank is bonded together, while the other is welded together.
To disconnect the tank, you only need to unscrew the mounting bolts.
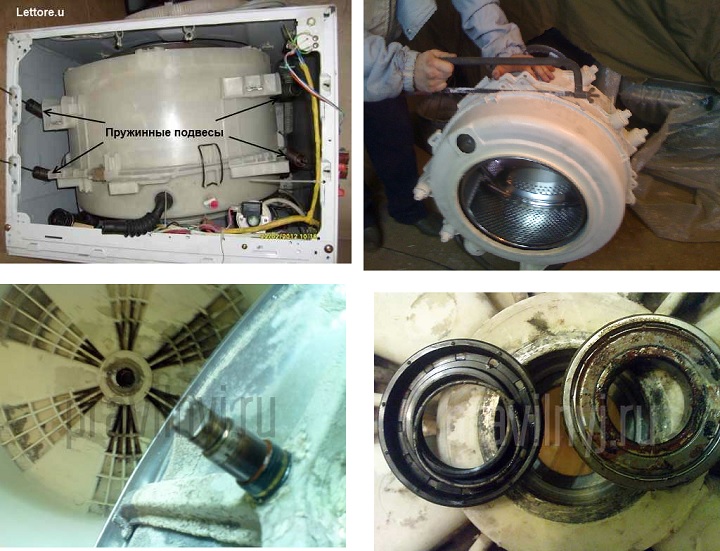
At this point, the oil seal becomes available and if it is to be replaced, you can use a screwdriver or pliers to get it out.
With the bearing is more complicated. It will have to be knocked out with a metal tube and a hammer. I think there is no point in talking about accuracy, it's already clear.
You can also replace the cross, again, as needed.
If the tank is not disassembled, it is more difficult to perform the repair yourself, you may need the help of a professional.
Changing the bearing
In what cases do you need to replace the part and how to remove the bearing from the drum of the washing machine?
For example, if a puddle was formed under the machine and there is a strong hum and vibration during operation. Why did this happen? It is very likely that the water got on the bearing and put it out of operation. In general, the service life of this part is not small from 7 to 11 years, but sometimes bad things happen and you have to perform early replacement.
Troubleshooting shock absorbers
Shock absorbers are responsible for the smooth operation of the drum during washing and spinning. There should not be any knocking.
How do you check them for malfunction?
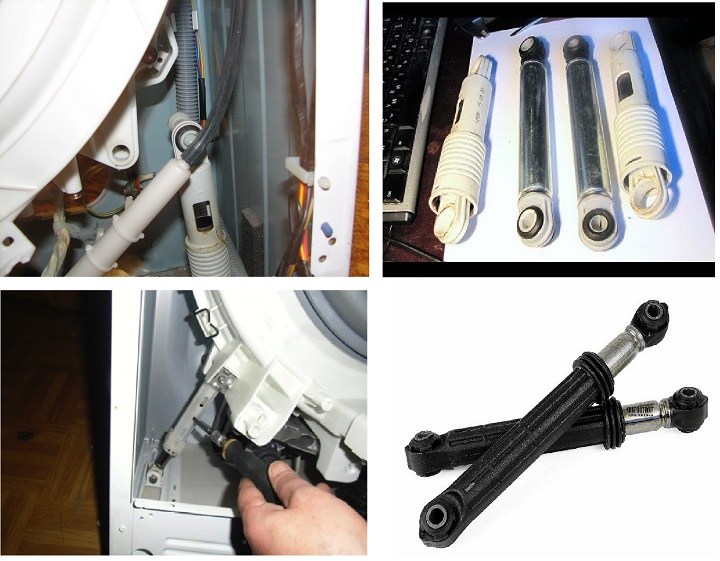 Simple. Open the machine hatch, and pull the drum toward you. Now release it. What happened?
If the drum is swinging from side to side and won't fit into place, it's a sure sign that the part needs to be replaced. And the replacement of the shock absorber should be done in pairs.
To do this, you do not have to disassemble the machine, as in the case of bearings, but the truth is only in LG, Veko, Ardo models. It is enough from the bottom side, unscrew the fasteners and change the parts. But with other models will have to tinker.
- - The top cover is removed and the dispenser is removed.
- - Disconnects the control unit.
- - The sealing rubber band with a clamp is removed.
- - The front part of the machine housing is removed.
- - The parts are replaced.
Removing the foreign object
What does a foreign object mean? It could be:
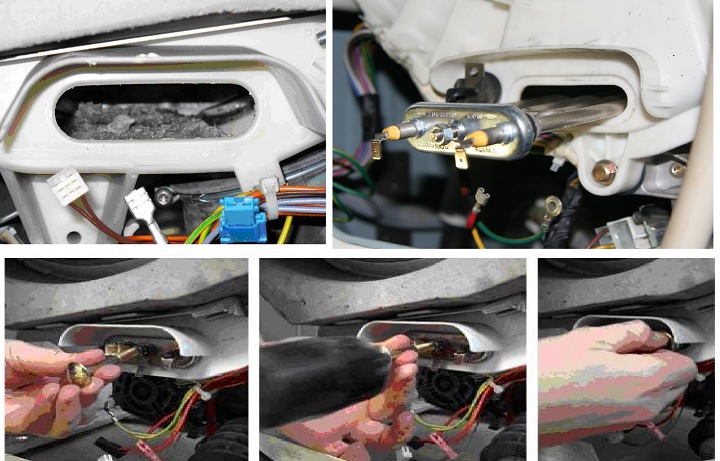 coins, even rhinestones,
- buttons and other items of clothing.
If you do not take out and free the drum from these things, the consequences can be sad, up to its jamming and breakage.
What other problems can be solved by yourself?
Changing the cuff
There are many reasons for cuff failure. It can be: wear and tear due to a long period of use, because of mold, because of cracks and tears, because of lime deposits, etc.
What is needed to replace the cuff and how to remove the rubber from the drum of the washing machine?
First, you need a new cuff, which should match the old one 100%, otherwise there may be an incomplete fit.
To make a replacement of the old rubber for a new one, you need:
- Remove the front panel of the machine, remove the powder compartment, remove the front of the machine.
- Disconnect the cuff.
Normally, the cuff is screwed to the tank with two metal clamps. You just need to pick up the spring of the clamp and pull. 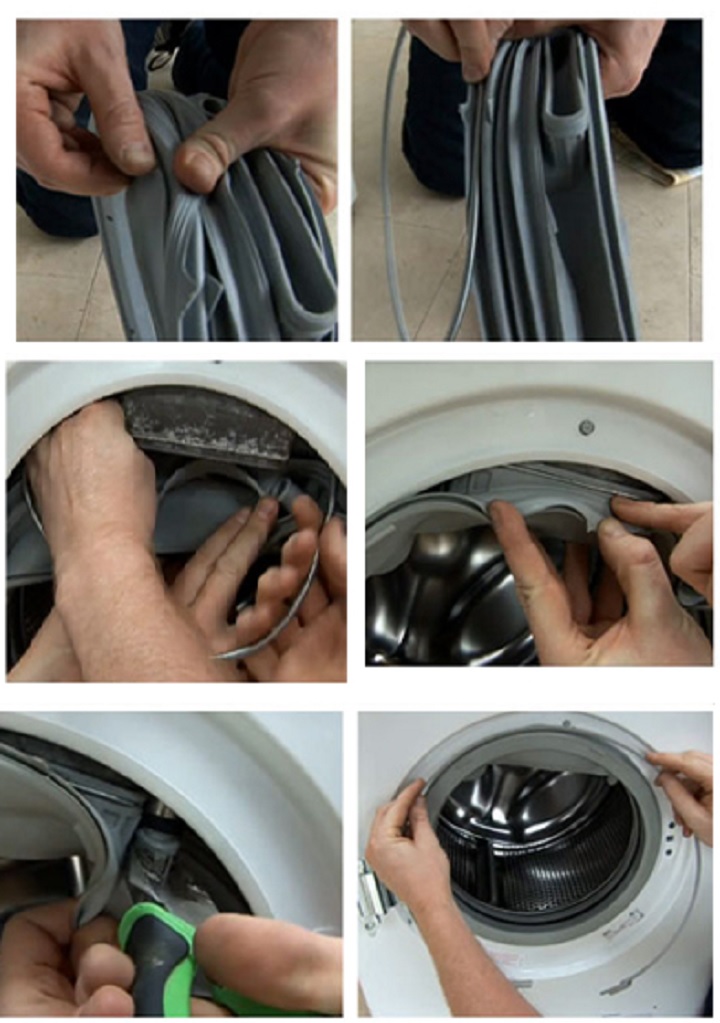 After the first clamp is removed, you can remove the top of the rubber band, which shows the correct location in the tank. The cuff is easily released and retrieved after the second clamp is removed.
- When installing the new rubber, the marks on the rim of the hatch serve as a guide.
- Prior to installation, it is necessary to clean the rim of the hatch at least simply with a soapy solution.
- The collar is stretched on the hatch. If the top is stretched, the bottom part is held; if the bottom, vice versa.
- Next, all parts are assembled in reverse order.
It remains to check the work done by running the wash without laundry. If there are no leaks, everything went well and you did it!