 Professional milling machine is quite expensive, but what if you want to try your hand at woodcarving or you need the machine rarely and for very minor works.
Try to make a milling machine with their own hands from an old washing machine.
General information
Advantages and disadvantages of a home-built machine
The only disadvantage of such a device is that the homemade machine does not have all the features of an expensive machine, but to do simple things, it is quite possible, and if you attach a little imagination, and with a homemade machine can get incredible beauty. Well, and the power will be inferior to a professional machine tool.
But there are also advantages of such a device, self-made machine tool is much more mobile, it is convenient to store at home and carry in your hands, unlike the professional machine tool.
The simplicity of design, also a plus, to collect their own milling machine tool can even be an amateur, and to replace parts in case of failure is also very easy. In addition, it is assembled from improvised parts, which means that their replacement will not affect your pocket.
Types of washing machine motors
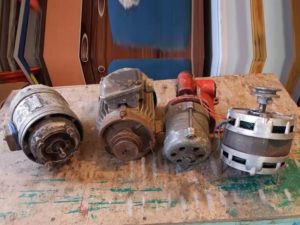 Before you find out how to make a machine with your own hands, you need to figure out what kind of motor you have. They come in several types.
Asynchronous: There are two types: two-phase or three-phase, respectively. The first were used in the old Soviet machines, the second are put in modern models.
Collector: a motor in which you can control the speed, often very compact in size.
And the last motors that are often put in Korean washing machines are direct-drive motors.
Important:
Before you start building a milling machine, remember safety precautions. And also clear your own free space so you don't hit anything in the process.
Read more at
Materials for the machine
Before you start assembling, you need to prepare all the materials.
- Drill, duct tape, screwdrivers and pliers, you will also need metal scissors.
- A tire iron or metal hacksaw, measuring tape, foam rubber or other dense material to protect the motor from debris.
- A stud to bind the cutter chucks together.
- Iron corners and screws to hold them in place.
- The motor, the most important part, is removed from the old washing machine and cleaned.
- A board or a thick sheet of plywood.
- Two metal tubes.
- Two shock absorber springs from a car and a swivel wheel of rubber.
- Something that will serve as your on and off button.
- An optional but easy to use part is a speed regulator, for example you can get it from an old drill.
Assembly instructions
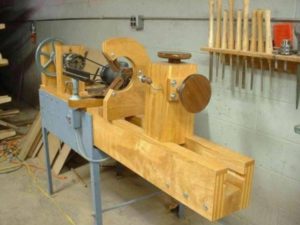
Let's proceed to the assembly of the milling machine with your own hands.
Step one:
 Clean the motor of the washing machine from dirt and remove possible fouling on it. It is also necessary to check the stability of its operation by connecting it to the mains. It is necessary to listen and determine whether there is any extraneous noise: clicking or cracking, such a motor is not suitable. It is necessary to have a functioning motor, which will rotate monotonically without extraneous noise.
Important: After checking, be sure to disconnect the motor from the power supply, you will not need a working motor during reassembly.
Step two:
Measure the size of the motor to determine what size the table will be for it. The dimensions are as follows: the table should be three times larger than the motor, and the motor itself should be 7-8 centimeters above the floor. We cut out a wooden structure of the right size.
Step three:
In the lid of the table make a hole for the backlash of the motor, and in the bottom a hole to install the nut.
Step four:
Assemble the finished table, using self-tapping screws and corners. In this way we with our own hands made a table for the milling machine.
Step five:
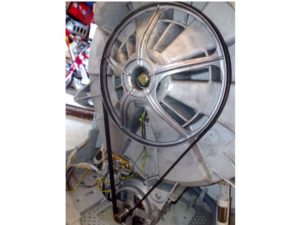
We proceed to the assembly of the machine itself, to the motor shaft we attach the clamping collet.
Step six:
We take the previously prepared tubes and use scissors to make special fasteners. With a drill, we make holes in the fasteners, so that they can be conveniently fixed to the table and the motor.
Step seven:
We attach the tubes to the back of the table to make our construction as stable as possible. Now the tubes must be carefully screwed to the motor from the washing machine.
Step eight:
We attach a nut to the bottom of the machine.
Step nine:
To securely fasten the motor, screw a stud into the nut so that the threaded end fits tightly against the motor.
Step ten:
Add springs so that the motor can be freely adjusted in height, and add a steering wheel if desired.
Step eleven:
It's time for the wiring, mount and connect to the power sensor, attach the start button and optionally the speed controller.
Important: After installing the wiring, make sure that all cables are insulated and not tangled.
Step twelve:
Install foam or other protection to avoid clogging.
Last Step
That's it, all that's left is to check your handmade wood router for performance and use.